Thursday, July 30, 2015

Change is Good: Introducing Ahava Home

Bruce isn't the only one allowed to change names! Goodbye @ahavadesignstx , hello @ahavahome!! 

Growing, developing, and simplifying a few things as we transition into the Fall season, starting with our name and a few services. Ahava is all things home - retail home decor and furnishings and furniture redesign services. Starting 8/1, Ahava will no longer provide interior or event design services. So grateful for the many families, business, brides, and grooms that Ahava has been privileged to celebrate with and decorate and design for over the past several years, but excited to narrow things down a bit and expand Ahava's pride and joy - decor and furnishings- and open the first North Dallas boutique in 2016.

Introducing, Ahava Home @ahavahome 

Follow @ahavahome 

#ahavahome #followahavahome #home #homedecor #decor #linens #lighting #lamps #lampshades #vintage #vintagefurnishings #furnitureflipped #furnitureredesigned #wallart #walldecor #accessories #ahava

Monday, July 20, 2015

Ahava Designs TX First Annual Backpacks for Kids Drive


Looking to help a child in need this fall?

Team up with Ahava Designs TX and help bless a child in need as they get ready to head back to school! We have teamed up with a local area elementary school in McKinney to give back! Here's how you can get involved!

Ahava Designs has adopted Bukhair Elementary in Richardson ISD to bless for the 2015-2016 school year! Many of the students that attend Bukhair come from low socio economic situations and something as simple as a backpack can be a huge sacrifice, especially for families with more than one child. Many of the children at Bukhair will not come to school with a back pack on the first day of school, so what a surprise for the babies without!

If you want to help bless a student and send them back right so that they can start the year off right, here is how:


When can I give?
Monday, July 20th - Thursday, August 20th.
(Ahava will deliver these on the 21st before school starts on that Monday.)

Where can I drop off or send my backpack or donation?  

You can mail them to:

Ahava Designs TX
P.O. Box 542
Frisco TX 75034 


You can drop them off at our new Canton location during Market Weekend:
Thursday July 31st- Sunday August 2nd! 

Our address in Canton is:
Old Mill Marketplace Village Shops
542 East Dallas Street
Suite 304
Canton, TX 75103

And I will be hosting a backpack drop off/coffee night Thursday, August 6th from 7-9 PM in Addison! (More Details to Come)


What do I need to give?
Just simply a backpack! 


Further Questions?

Shoot any questions you might have to:
ahavadesignstx@yahoo.com or direct message me!

Wednesday, June 24, 2015

Hello Summer! Wait, Im Not Ready! 5 Quick Ways to Revamp your Space for the New Season


Hello Beautiful People!

So, if you are a home decor addict like myself, we go through various phases when new seasons approach as far as decor and design are concerned- excitement, joy, creativity, anxiety, stress, and even a little confusion sometimes. We want to make it feel and look like the new season around our homes, but because seasons and trends come and go so fast, we can't bulldoze it all and fixer upper every room, every single time. But, there are small things that can be done that can totally give your space the seasonal facelift or revamp that you need without having to do the absolute most.

Here are my top 5 seasonal revamp tips that help me season up my space every time! Here we go!

1.) Pillows, Pillows, and More Pillows!


I have mentioned this one in a blog before, and I will say it again- It's all about swapping out or spicing up the pillows. Find out the top paint colors of the season or a trend that you are really liking, pick a color or trend that you really like that also somewhat coordinates with your sofa, chairs, or bedding (or wherever you plan to put the pillows), and swap them out. Pillows can add the perfect touch of color or latest fad without you having to purchase a new piece of furniture. One of my personal favorite retailers for gorgeous pillow covers is none other than West Elm


This is one of my fave pillows that West Elm had recently. Check out this photo from their website that shows this little lovely pop of color in a neutral designed living area.


Another new favorite decor spot of mine is Joss and Main. Check out some of their pillows this season! Their pillows are bold and can add that extra touch of spice that your space is looking for.


You can purchase trendy covers or entire pillows for reasonable prices. My pride and joy and one of Dallas' best - Ahava Designs TX - has a great selection of pillows and pillow covers that may be just what you are looking for.


2.) Insert Pops of Color


My home is very neutral, and on purpose. I have neutral furniture and I love rustic wood. It sounds boring I know, but makes for the perfect canvas when it's time to add colors to it each season. I have the freedom to add bold colors and trends because since everything is neutral, it's free game. To each is their own, but if you love to decorate and change things up, revamp your space in neutral tones overall. Then, indulge in color via accessories and linens and such as the seasons change. 

To give you an idea of how a bright pop of color can transform a piece and thus in turn transform a space, I recently revamped a traditional buffet from a boring black finish, to a bright and bold royal blue. Royal and cerulean blues are very IN this season so I figured I would go there when redesigning this piece. I was able to purchase the piece for a little of nothing, and broke out the chalk paint, new hardware, and antiquing stain and went to town! In working on it, all I could think was that it would be the perfect standout piece for a client or shopper looking to import a savvy color of the season into their space without changing absolutely everything. 

Take a look at the BEFORE and AFTER.


3.) Swap Furniture Room to Room or Rearrange the Furniture in the Space


I am the queen of this and do it every single season- whether its one piece of furniture or a couple. You have more to work with than you think you do, friend. Don't go out and buy tons of new furniture anytime you get the itch to redecorate for the season. That will slowly become a junky, hoarderesque, mix match mess. 


 (Photo Courtesy of Apartment Therapy)


Move that accent table from the corner in the front room to a bedroom next to that accent chair that no one sits in ever to make it a reading space. Or, move that iconic dresser or armoire that is collecting dust in the entry way to the living room space to display frames or other decor on. Move things around, shake things up!


4.) Light up the Lighting


One of my favorite pastimes is finding vintage lamps and salvaging the bases and redesigning them. This is what we do at Ahava Designs TX. I recommend checking local thrift or resale shops for unique bases. Check out the variety at a resale shop here in Dallas.


You might have some lamps sitting around that you want to spice up or check out a local resale shop and find a few. Ensure that the wiring and such are legit and in tact FIRST, then begin the revamp. Use painters tape to cover your cords securely and to cover the bulb and harp area as well. 


Find a semi glossy bright color of spray paint and a can of primer, and head outside and give it a go. Prime first, let it dry, paint a coat of color, and then let it dry. Sometimes you might need a second coat, and if so proceed. Then, seal it with a shellac or varnish of your choice. Once it is completely dry, remove the painters tape, put your shade back on that little lovely, and show it off!

Here are a few Ahava Designs TX lamps that we have spiced up a bit!


5.) Add Art: Recycle, Revamp or Reframe Thrift Store Art


I see art in everything. So, when someone asks how do I know if a print is good art, my response is always- much like beauty, art is in the eye of the beholder. 


I don't like cliche prints or those that anyone can buy on ikea.com. That is not a bash at Ikea because I advertise them here often and love much of their products, but I am simply suggesting branching out and finding something rare, not just a reprint. As I said earlier, I love resale shops. And some of the best and most rare artwork ends up in places like that- often ignorantly displaced and written off as trash. While the frames may look a little icky, the print itself you can almost always salvage. 


Frames are super inexpensive and easy to replace. And in some lucky cases, the original framing may still be in good condition where you can just paint it and not have to replace it. The only place that I buy frames for any project is Ikea, period. They have a vast selection of shapes, sizes, etc., and you can repaint ANY of them with a good primer and a killer spray paint color (my favorite part)! Pick a bold color, a color of the season, and add a nice touch of artistic expression to your space with simply some upcycled art. Not only will your new artwork provide some new eye candy in your room, but the savvy color of the season radiating from that frame will look even better!

 Check out this BEFORE and AFTER thrift store art makeover from dans-le-townhouse.blogspot.com via Pinterest.


You can keep things relevant without going overboard! Small changes are wise and can make all the difference. Give a few of these go-to tips of mine a shot this summer season and take your space from so last season, to summer 2015 without a lot of stress and hard work.

XO


Friday, May 29, 2015

DIY Color Block Flower Pots in 5 Steps!


Happy Summer Folks! Well almost, right?

We have almost had to call Noah for his ark to survive here in Dallas, and its put a sure hold on time to get outside painting! I have missed you guys! But, better late than never!

Color Block Pots in 5 Steps…3…2…1…Here we go!


Materials:


  • A few terra cotta clay pots with trays (I HIGHLY recommend Ikea for sizes and prices)
  • A tarp or drop cloth
  • A can of white, flat primer spray paint
  • A few cans of your fave spray paint colors (Be bold!)
  • Painter's Tape
  • A can of shellac or sealant
  • A pencil


Step 1:

Find yourself a few basic terra cotta clay pots. The size is completely up to you. I recommend getting ones with trays if you plan to use them to for real flowers. If you plan to use yours to hold pens or as storage, no trays are needed. We have an Ikea here in Dallas so I went there and found some for a great price and in which the trays were included. 


While you're out, drop in home depot or Lowe's and grab you a few cans of savvy colored spray paint and one can of flat white primer spray paint. I went to Lowe's so I grabbed a $5 Valspar primer and it was awesome.


Place your pots on a tarp or drop cloth and prime your pots. Prime on side. Let them dry 15-20 minutes, then flip them and complete the other side. Lightly prime the inside of the actual pots also.


Step 2

After your pots are primed and DRY, using a pencil, lightly sketch the design or block creation that you are trying to make on your pot. You do NOT have to use the pencil at all if you do not want to. This is art, so there is no wrong design. I personally didnt use a pencil for a lot, but started first by just placing painter's tape on my pot to create the idea that I had in mind. The idea of the entire design is color in mass- color in blocks. So, you don't have to perfectly place apply your tape. See how I positioned my tape below. (If you notice the after photos at the end, I ended up readjusting my smaller design as I was painting. Be flexible, be creative!)


Step 3: 

Spray paint your trays (if you are including trays). I chose to paint my trays solid in a metallic silver by Valspar. 


Then, I spray painted random sections on my clay pots with that same color. Use as much painters tape as you need to cover spots that you want to avoid coloring with that color. Leave that to dry for 25-30 minutes, then do one more light coat. Leave that to dry WELL for 1-2 hours.


After that, once more, spray paint another section on your pot with a different color.(Remember: Use as much painters tape as you need to cover spots that you want to avoid coloring a certain color). Leave that to dry for 25-30 minutes, then do one more light coat.


Touch up any spots with your spray paint as needed. Let your pots dry overnight to make sure that they COMPLETELY dry before you proceed to step 4.


Step 4:


Remove all painters tape, and if you are 100% certain that all of the paint is dry, place tape over the already painted portions of the pot to protect it while you spray the remaining unpainted parts of the pot with a different color. Leave your pot to dry several hours or COMPLETELY. Then, remove all of the painter's tape.


Step 5:

Place your pots and trays on your tarp or drop cloth, and lightly spray them with the sealant of your choice. I went with a water based polyurethane of course, but you can use Shellac or another that your prefer. And……drum roll please…..


Until next time,


Always tag @ahavadesignstx on Instagram, Facebook, Twitter, or Pinterest with photos or feedback from your DIY adventures and completed Ahava projects! We would love to display them and cheer you on! XO


Saturday, May 2, 2015

April Showers Bring May Flowers: 5 Creative Ways to Show Off Those New Blooms


Spring blooms are here and its time to switch up the way you put those little lovelies on display! Atypical is my fave, so I have 5 unique ways to style your flowers this season. Here we go!

1.) Vintage Bird Cages


These are one of the coolest ways to show off those flowers! I went to a local thrift shop and found a cute little hanging bird cage for a whole $2.99. Yes, $2.99. 


I spray painted my little lovely with a gold metallic paint. 


Once it dried, I used a small, organic paper pot to repot my flowers in, and then sat that inside of the bird cage. Carefully string your blooms through the bars of the cage, and use a cute burlap or decorative ribbon to surround the pot in. So stinkin adorable! See my before and finished product photos!


Here are a few others via Pinterest!


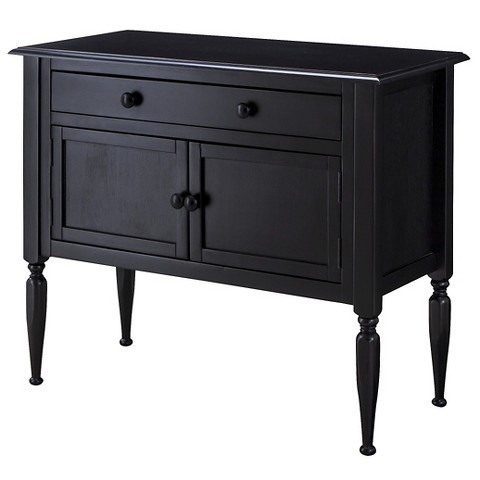
2.) Old Drawers Refurbished


I had an old nightstand that I was unable to refurbish as a whole, but that had perfect drawers that could be salvaged. I removed one, chalk painted it (for help with chalk paint, visit our last post The Alternative to Sanding: 5 Chalk Paint Tips and How-Tos), and then potted my flowers in it. 


BEFORE

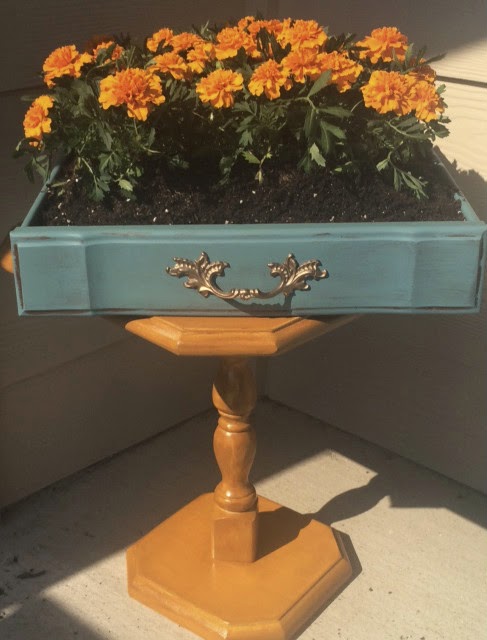
You can line it with coconut liner and plant them in that. Or, you can measure the length and width of the drawer and find a flat, plastic tray-like pot to plant them in. Choose a pretty color of the season, a royal blue, a mint green, or a classic fuchsia to paint the drawer, and even change the hardware to something a little more savvier. I used a beautiful spring color by Martha Stewart called Hosta that I made my chalk paint with. You can get it at Lowes. I loved the original hardware, but it needed a touch up. I simply removed it, spray painted it, and put it back on!


 AFTER


REMOVE AND PAINT YOUR HARDWARE. I RECOMMEND A KRYLON PAINT COLOR. I USED A METALLIC GOLD.


The drawers are unique and also depending upon the size and dimensions of them, give nice room for you to fit a generous amount of flowers in them. I think I am going to find a few more drawers to paint to pot some more blooms in this season. Here is the final product!


Here are a few other examples that I found on the net! 


(Top Photo courtesy of funkyinteriors.net)


(Photo courtesy of Pinterest.com)

3.) Vintage China or Kitchenware


I went to a Goodwill store and found a beautiful vintage china gravy bowl and potted my flowers in it. And WOW! The vintage china was in mint condition and honestly I could have left it without paint and it would have still been fabulous. But, I love to paint and I like color. So, I painted mine with a nice silver grey, something neutral that wouldn't distract from my bright flowers.


I have seen some neat ideas on Pinterest also of people planting them in china cups, pitchers, and even colanders. Who knew kitchenware and china could become flower pots?


(Both photos courtesy of Pinterest.com)


4.) Vintage Milk or Tin Cans


I lucked out and got my hands on a vintage milk can, added some color, and planted some of my flowers in it. You do not have to paint them, they are just as cute in their natural vintage state. Here is my milk can creation below.


Another idea that I recommend as far as vintage tin goes, are old tool cans or oil cans. Check out a few other tin can creations flower pot creations.


(Both photos courtesy of Pinterest.com)


5.) Wine Boxes


I decorated/designed for a wedding last year and was given some gorgeous solid wood wine boxes from the bride and groom. As an avid wine connoisseur, it was the perfect gift! 


We served wedding favors in them, but I remember thinking to myself, you could totally plant something in these- how gorgeous would that be? And I have discovered that it indeed is. Use a coconut liner or a shallow plastic pot to settle your flowers in, and then place that inside of the wine box. I didn't want to rot out the wood with moisture and wanted to be able to reuse it for the next bloom. 

Check out a few posted on pinterest!


(Both photos courtesy of Pinterest.com)

So, step outside of the box this season and plant those blooming beauties in something a little spicier! 


What other cool ways have you displayed your flowers? Or what neat things have you ever transformed into flower pots?

Tweet us, snap a photo of it, or post on our page and share @ahavadesignstx

Until Next Time,
XO